Getting Started

Flexreturn
Last Update há 5 anos
FlexReturn Return Portal is a highly flexible, customizable and automated self-service return portal for customers to submit order returns. It also provides easy to use and powerful features for merchants to manage order returns efficiently.
FlexReturn Return Portal provides many powerful features such as:
- Create return rules by different countries, resolutions, reasons, order grand total, etc
- Setup return requirements to block ineligible return requests.
- Customize return portal page's color, logo, branding.
- Send email notification for every status in the return process
- Automatically generate return shipping label for hundreds of carriers.
Merchant Guide:
1. Add your return portal URL to your Shopify store menu.
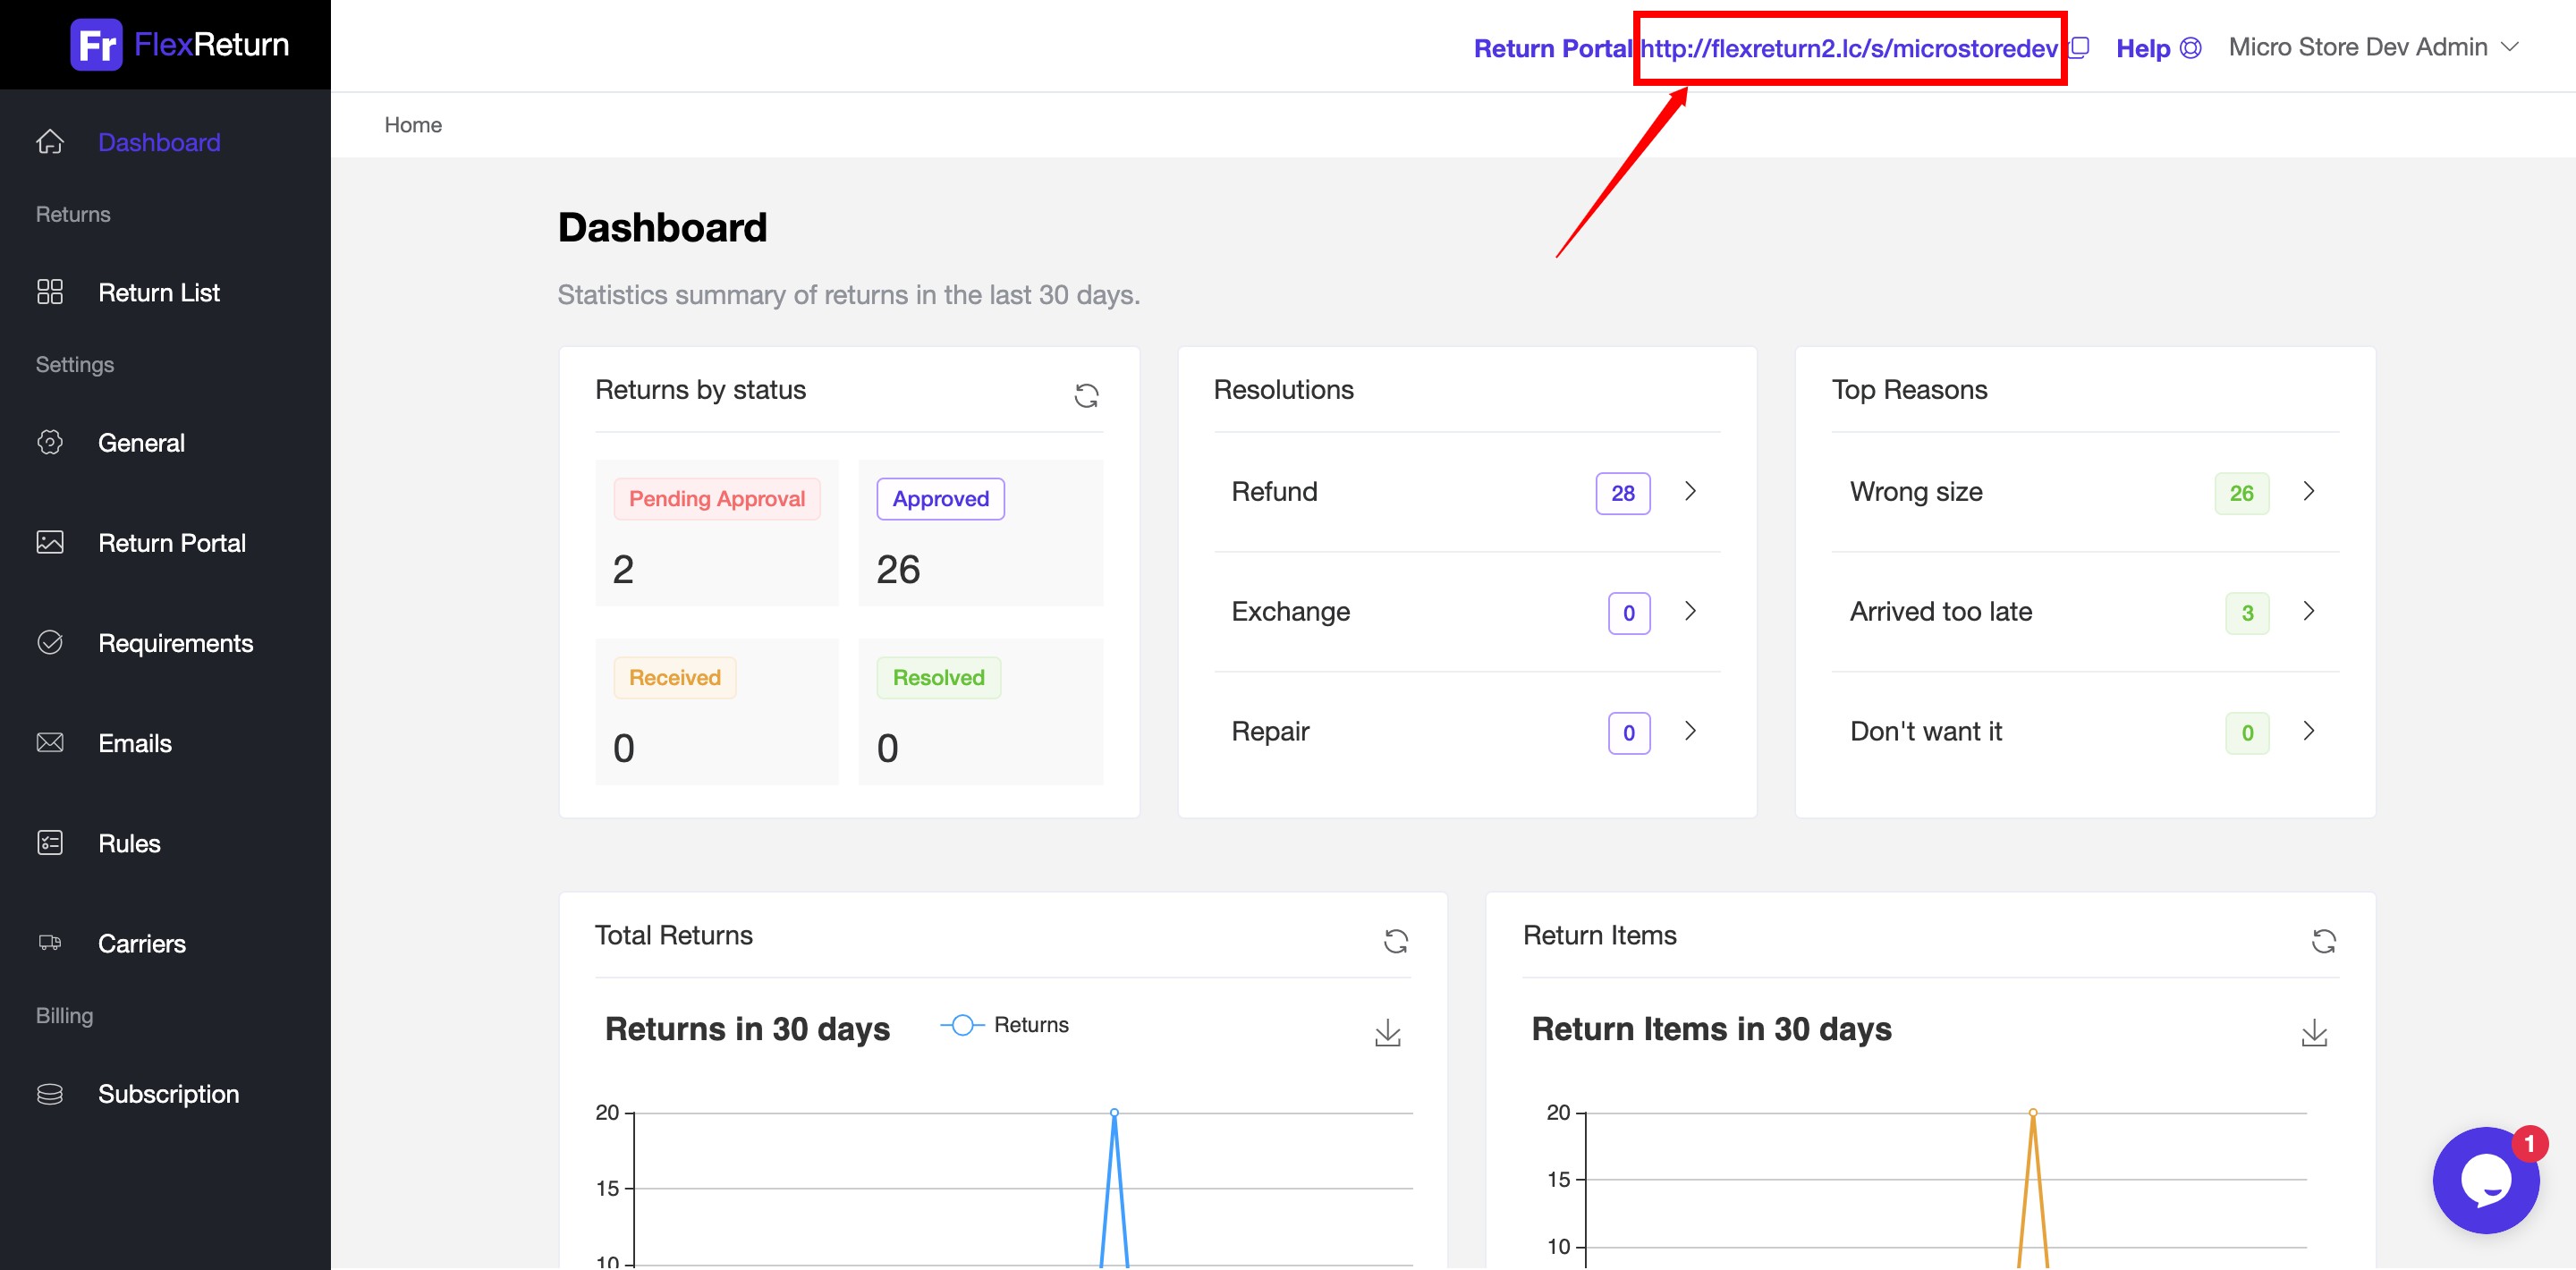
Go to FlexReturn admin, copy the Return Portal URL located at the top right corner.
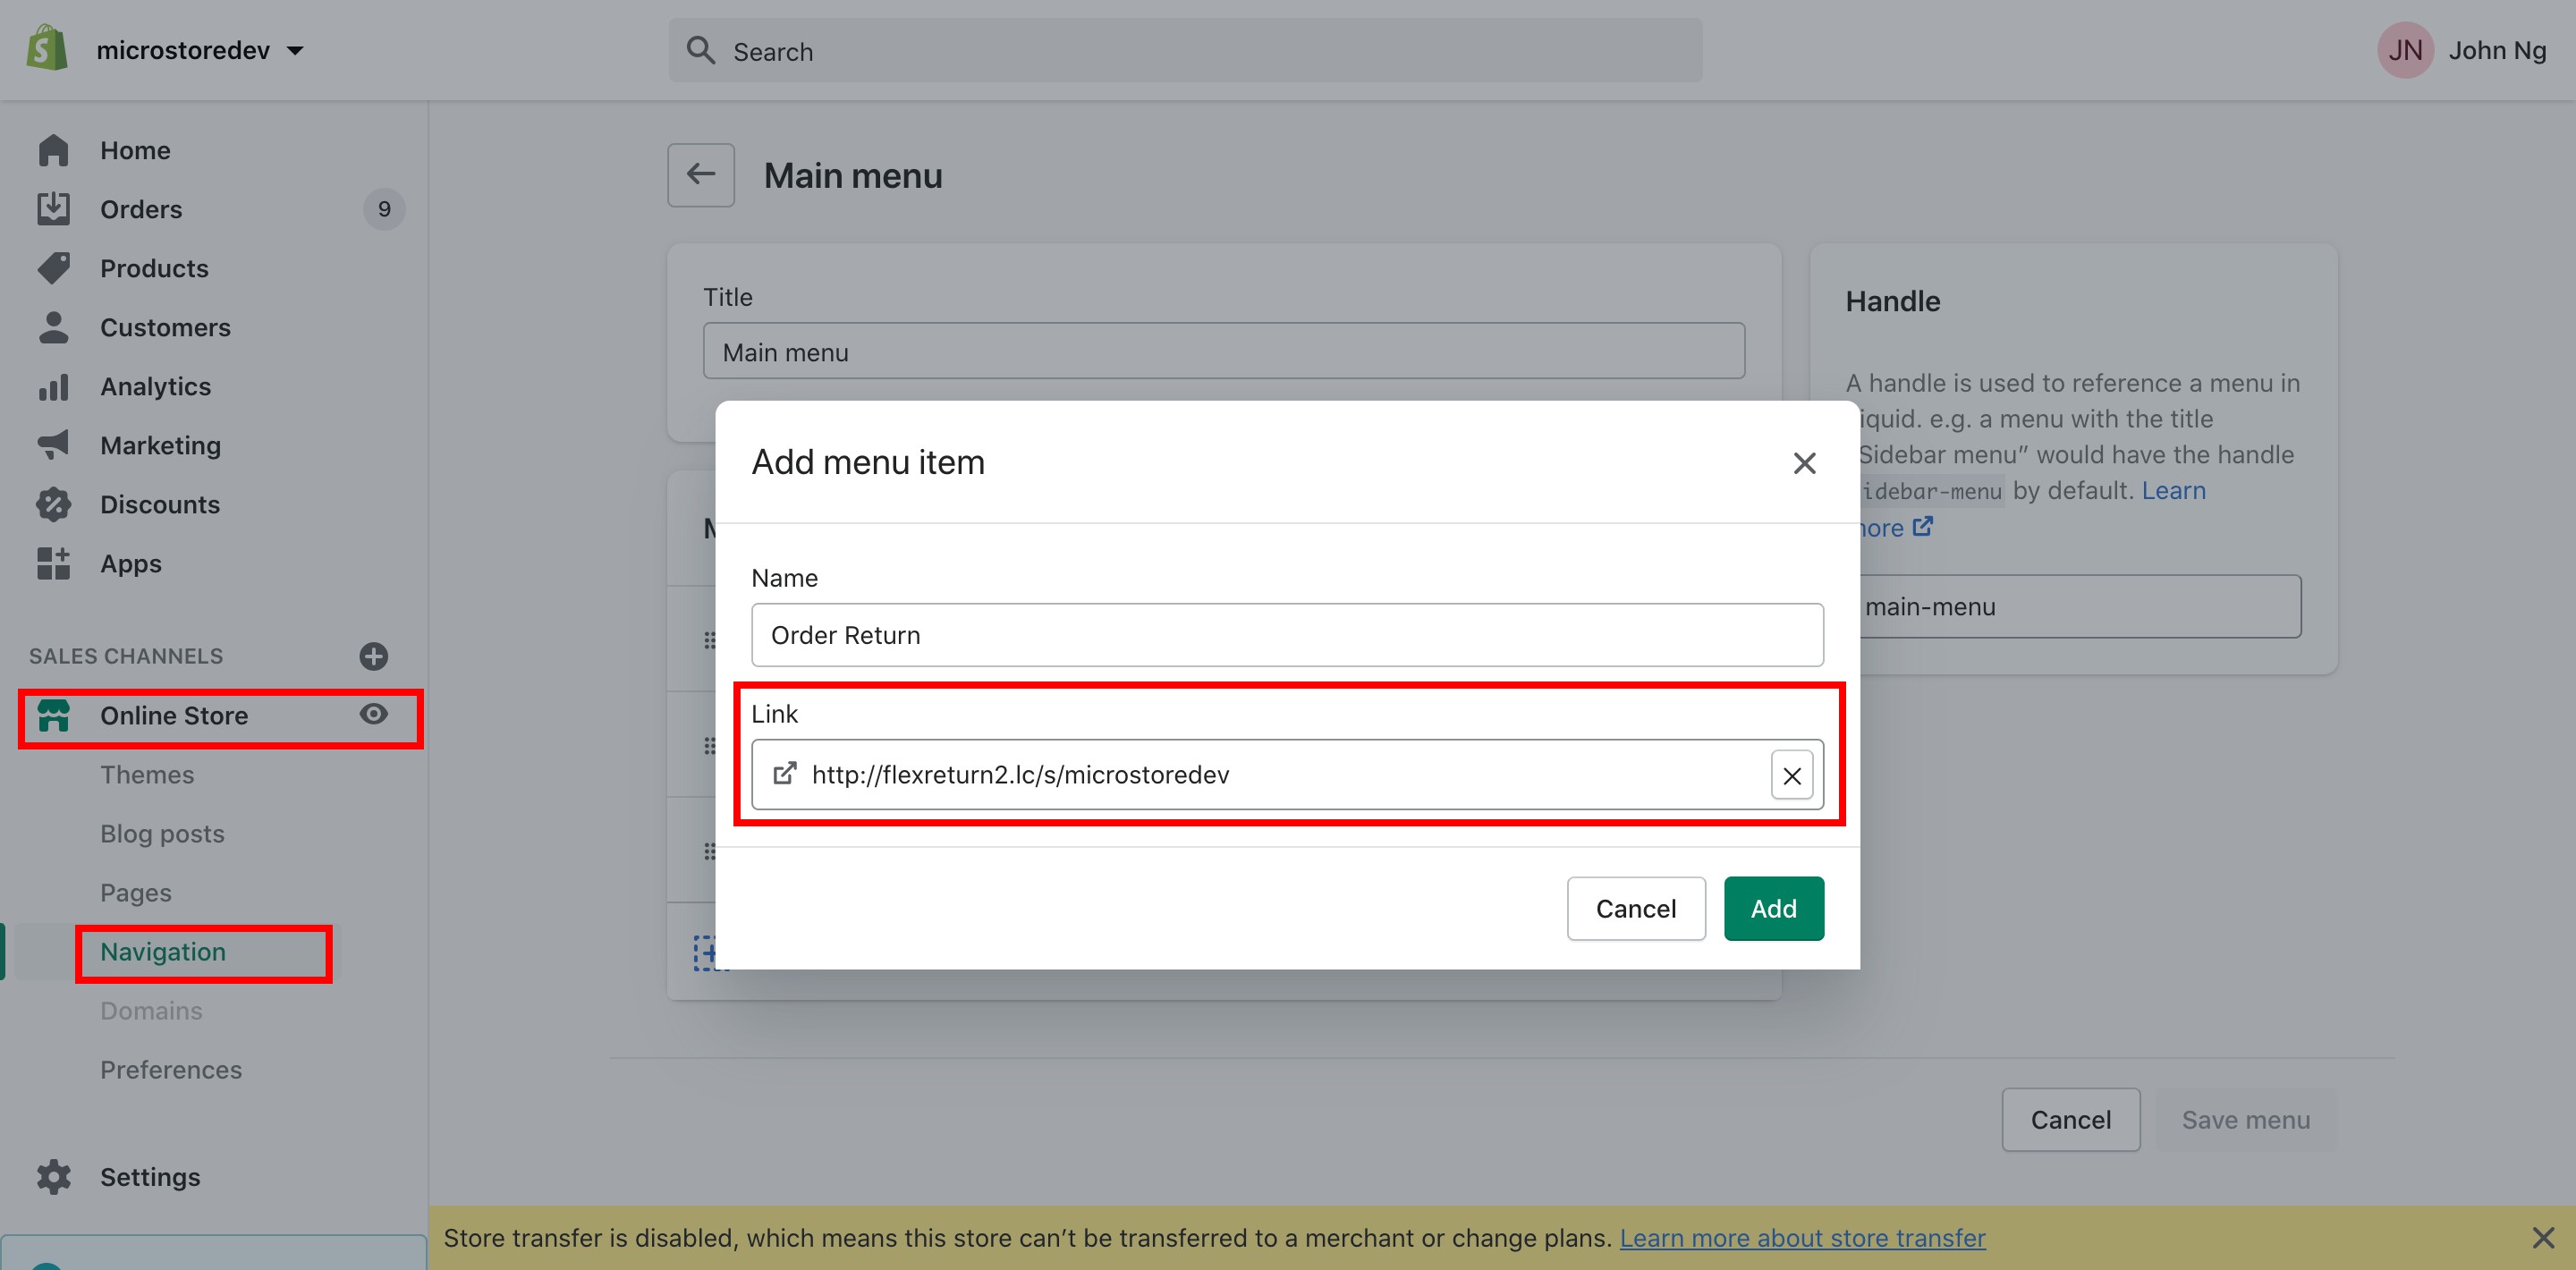
Then go to your Shopify store admin > Online Store > Navigation > Add Item, paste your return portal url to the Link, and enter a Name like "Order Return", and click Add.
2. Customize return resolutions, reasons, and return address.
Go to Settings > General > section Reasons, add new or edit existing reasons, then click Save
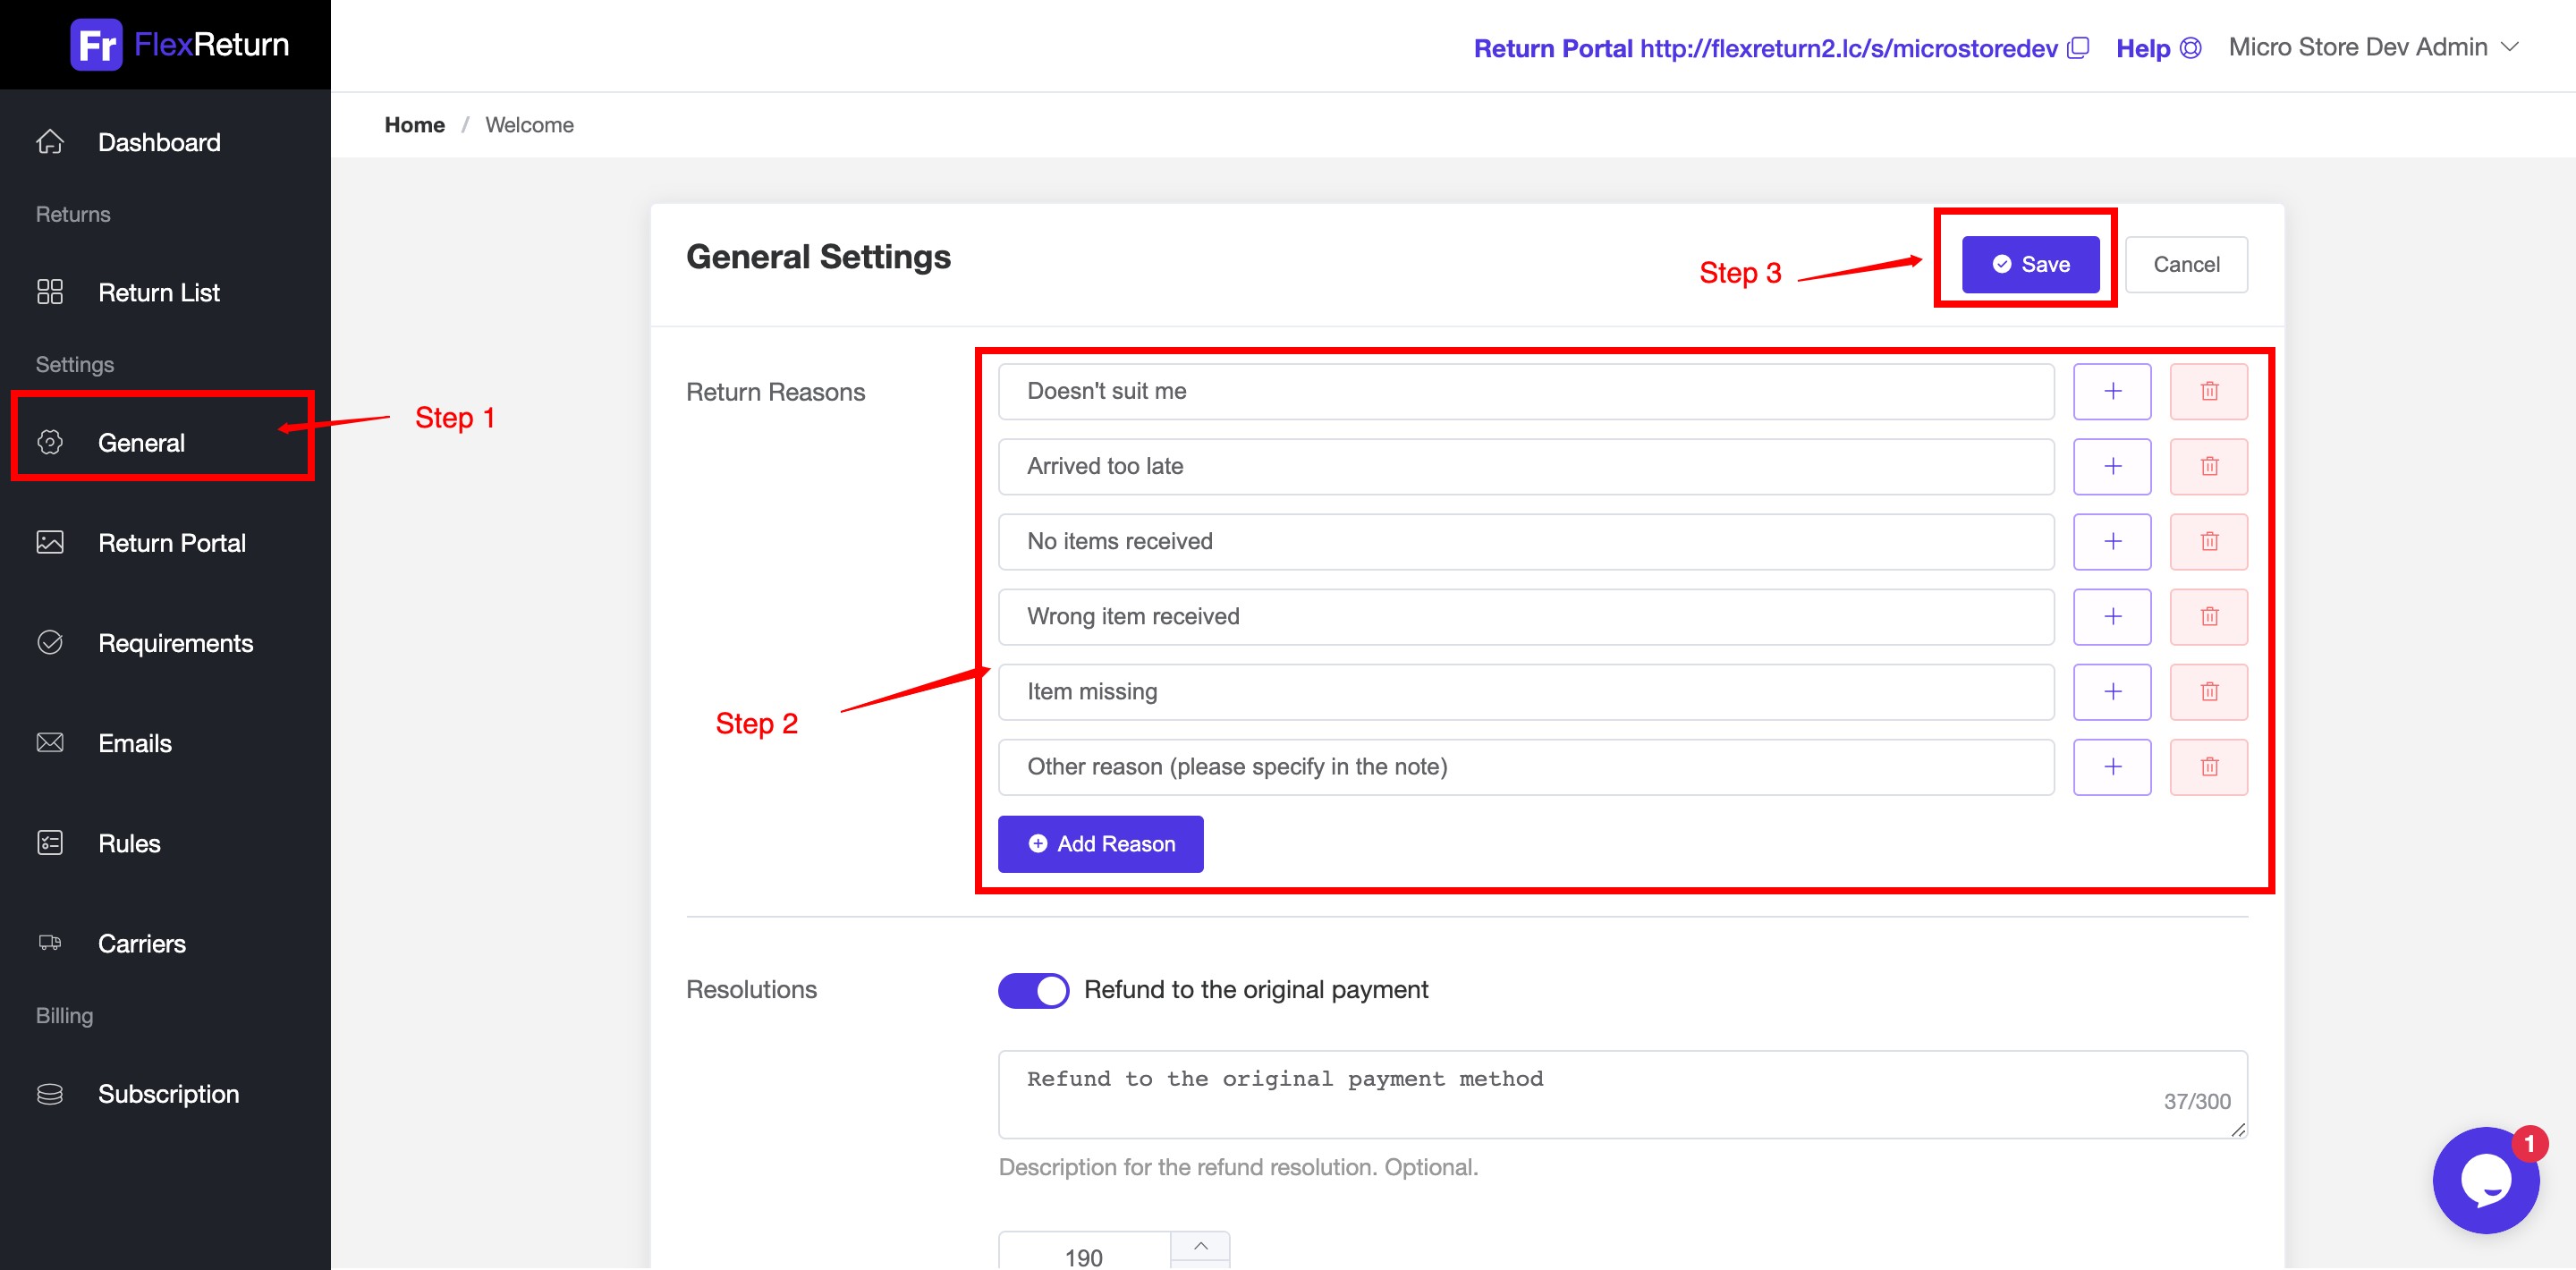
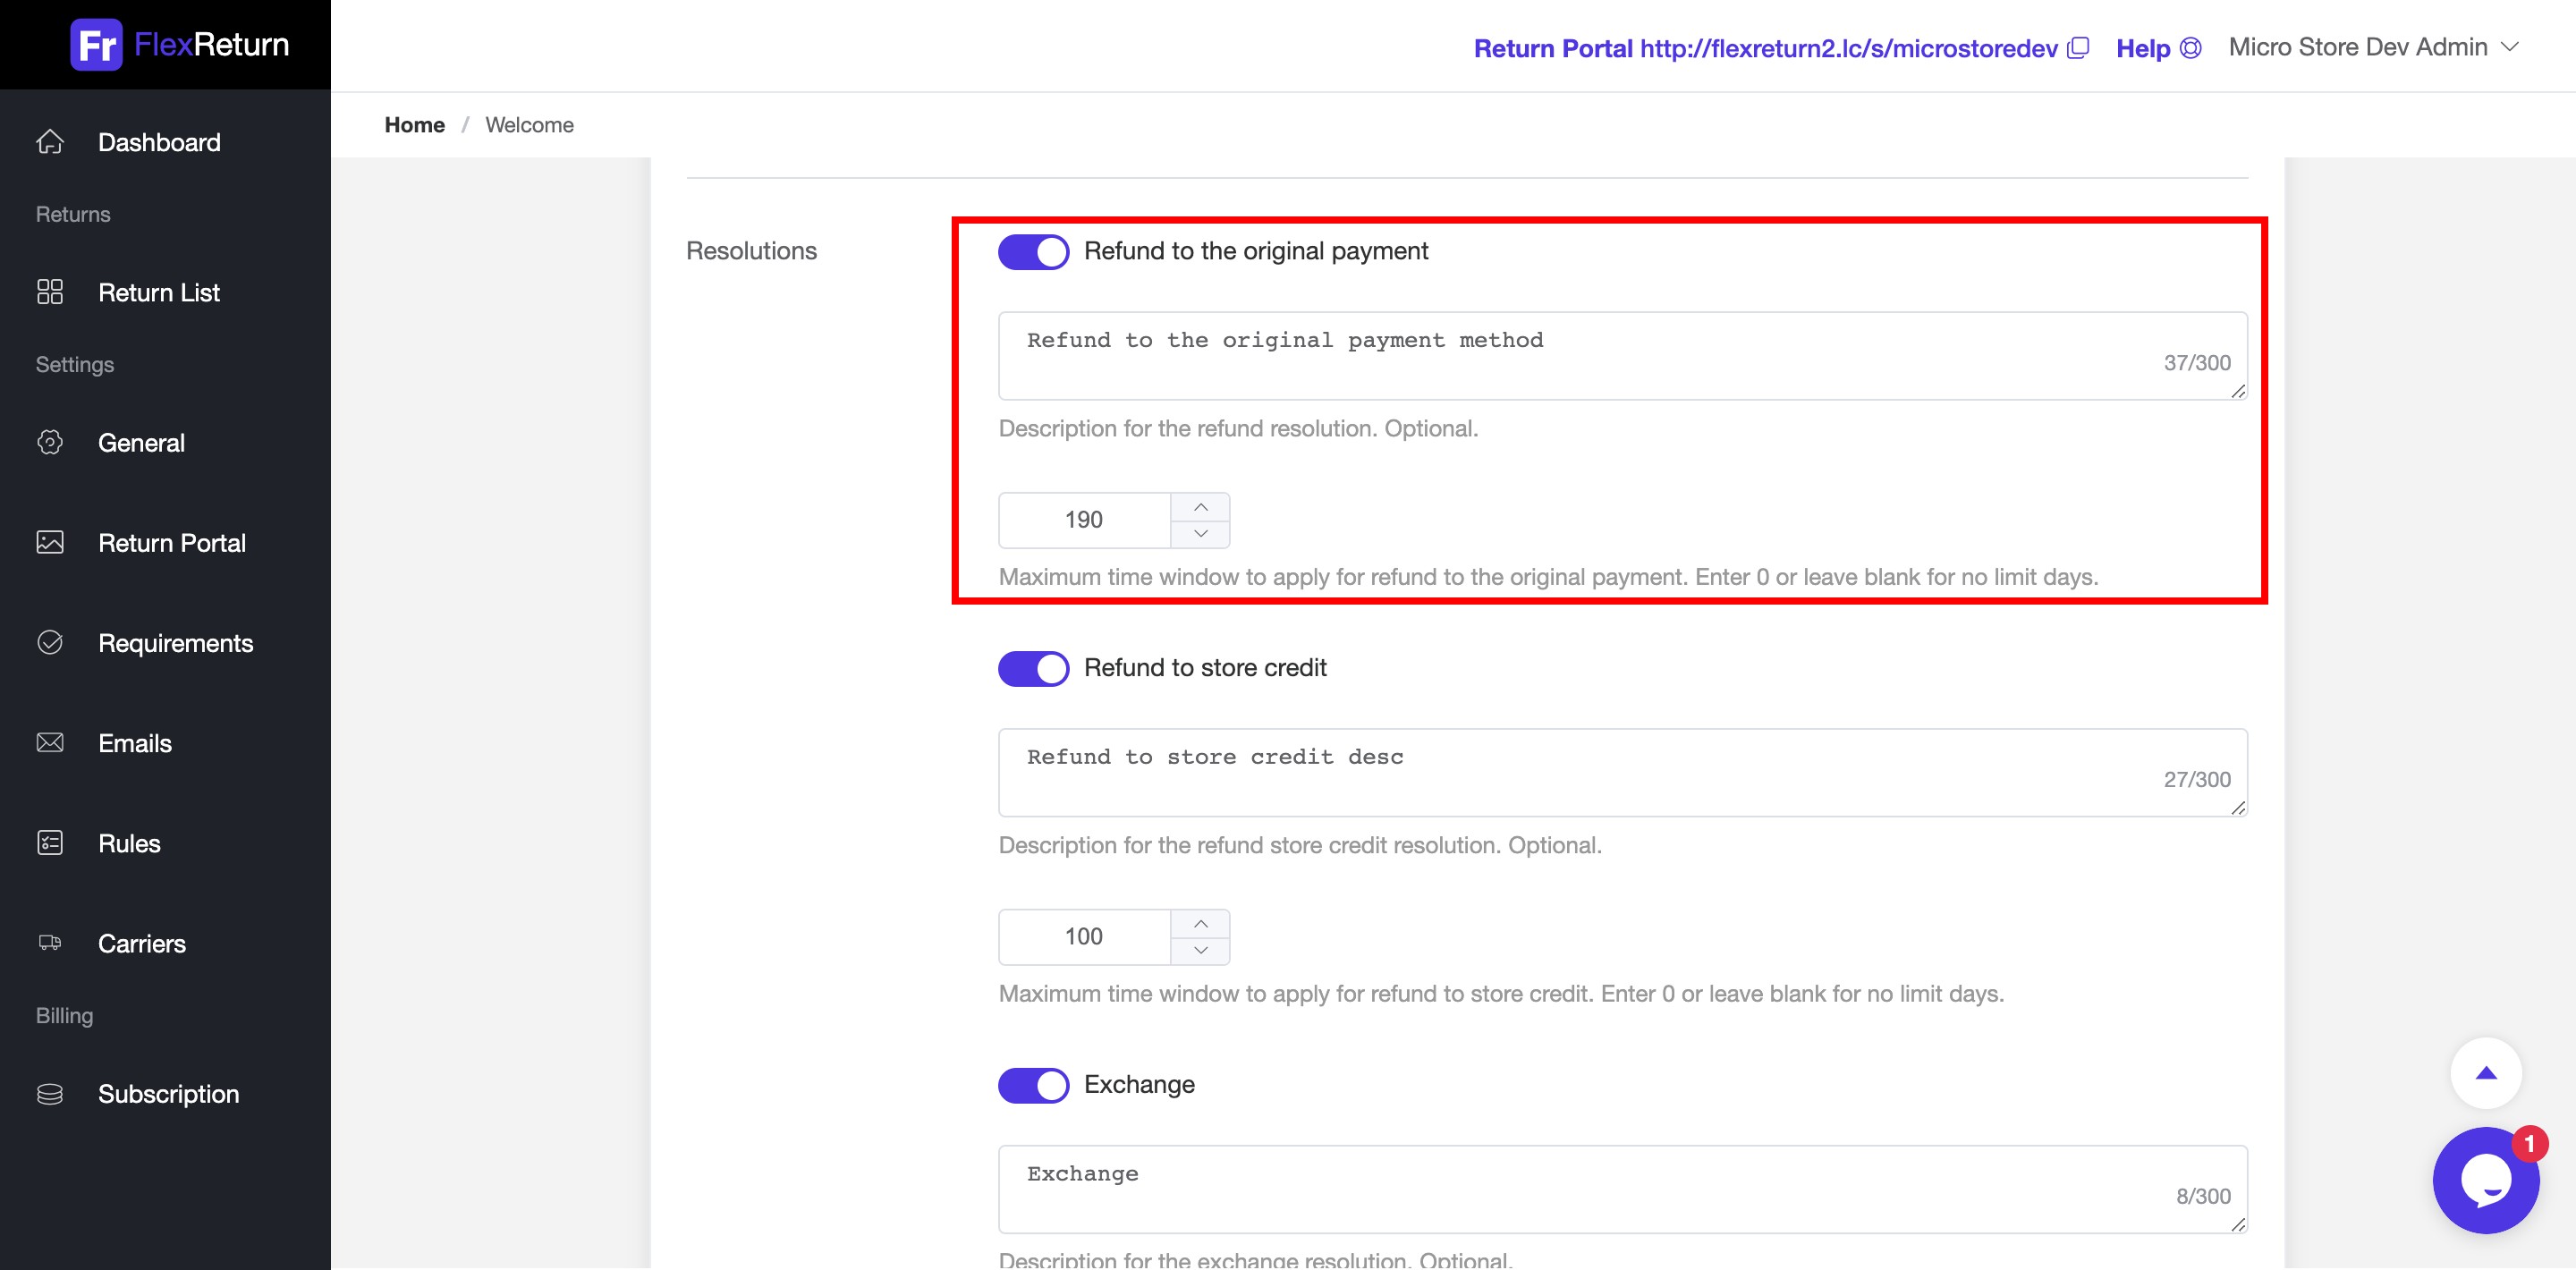
At section Resolutions, you can toggle the switch to enable / disable the resolution, edit description for it, and specify effective window days since order created.
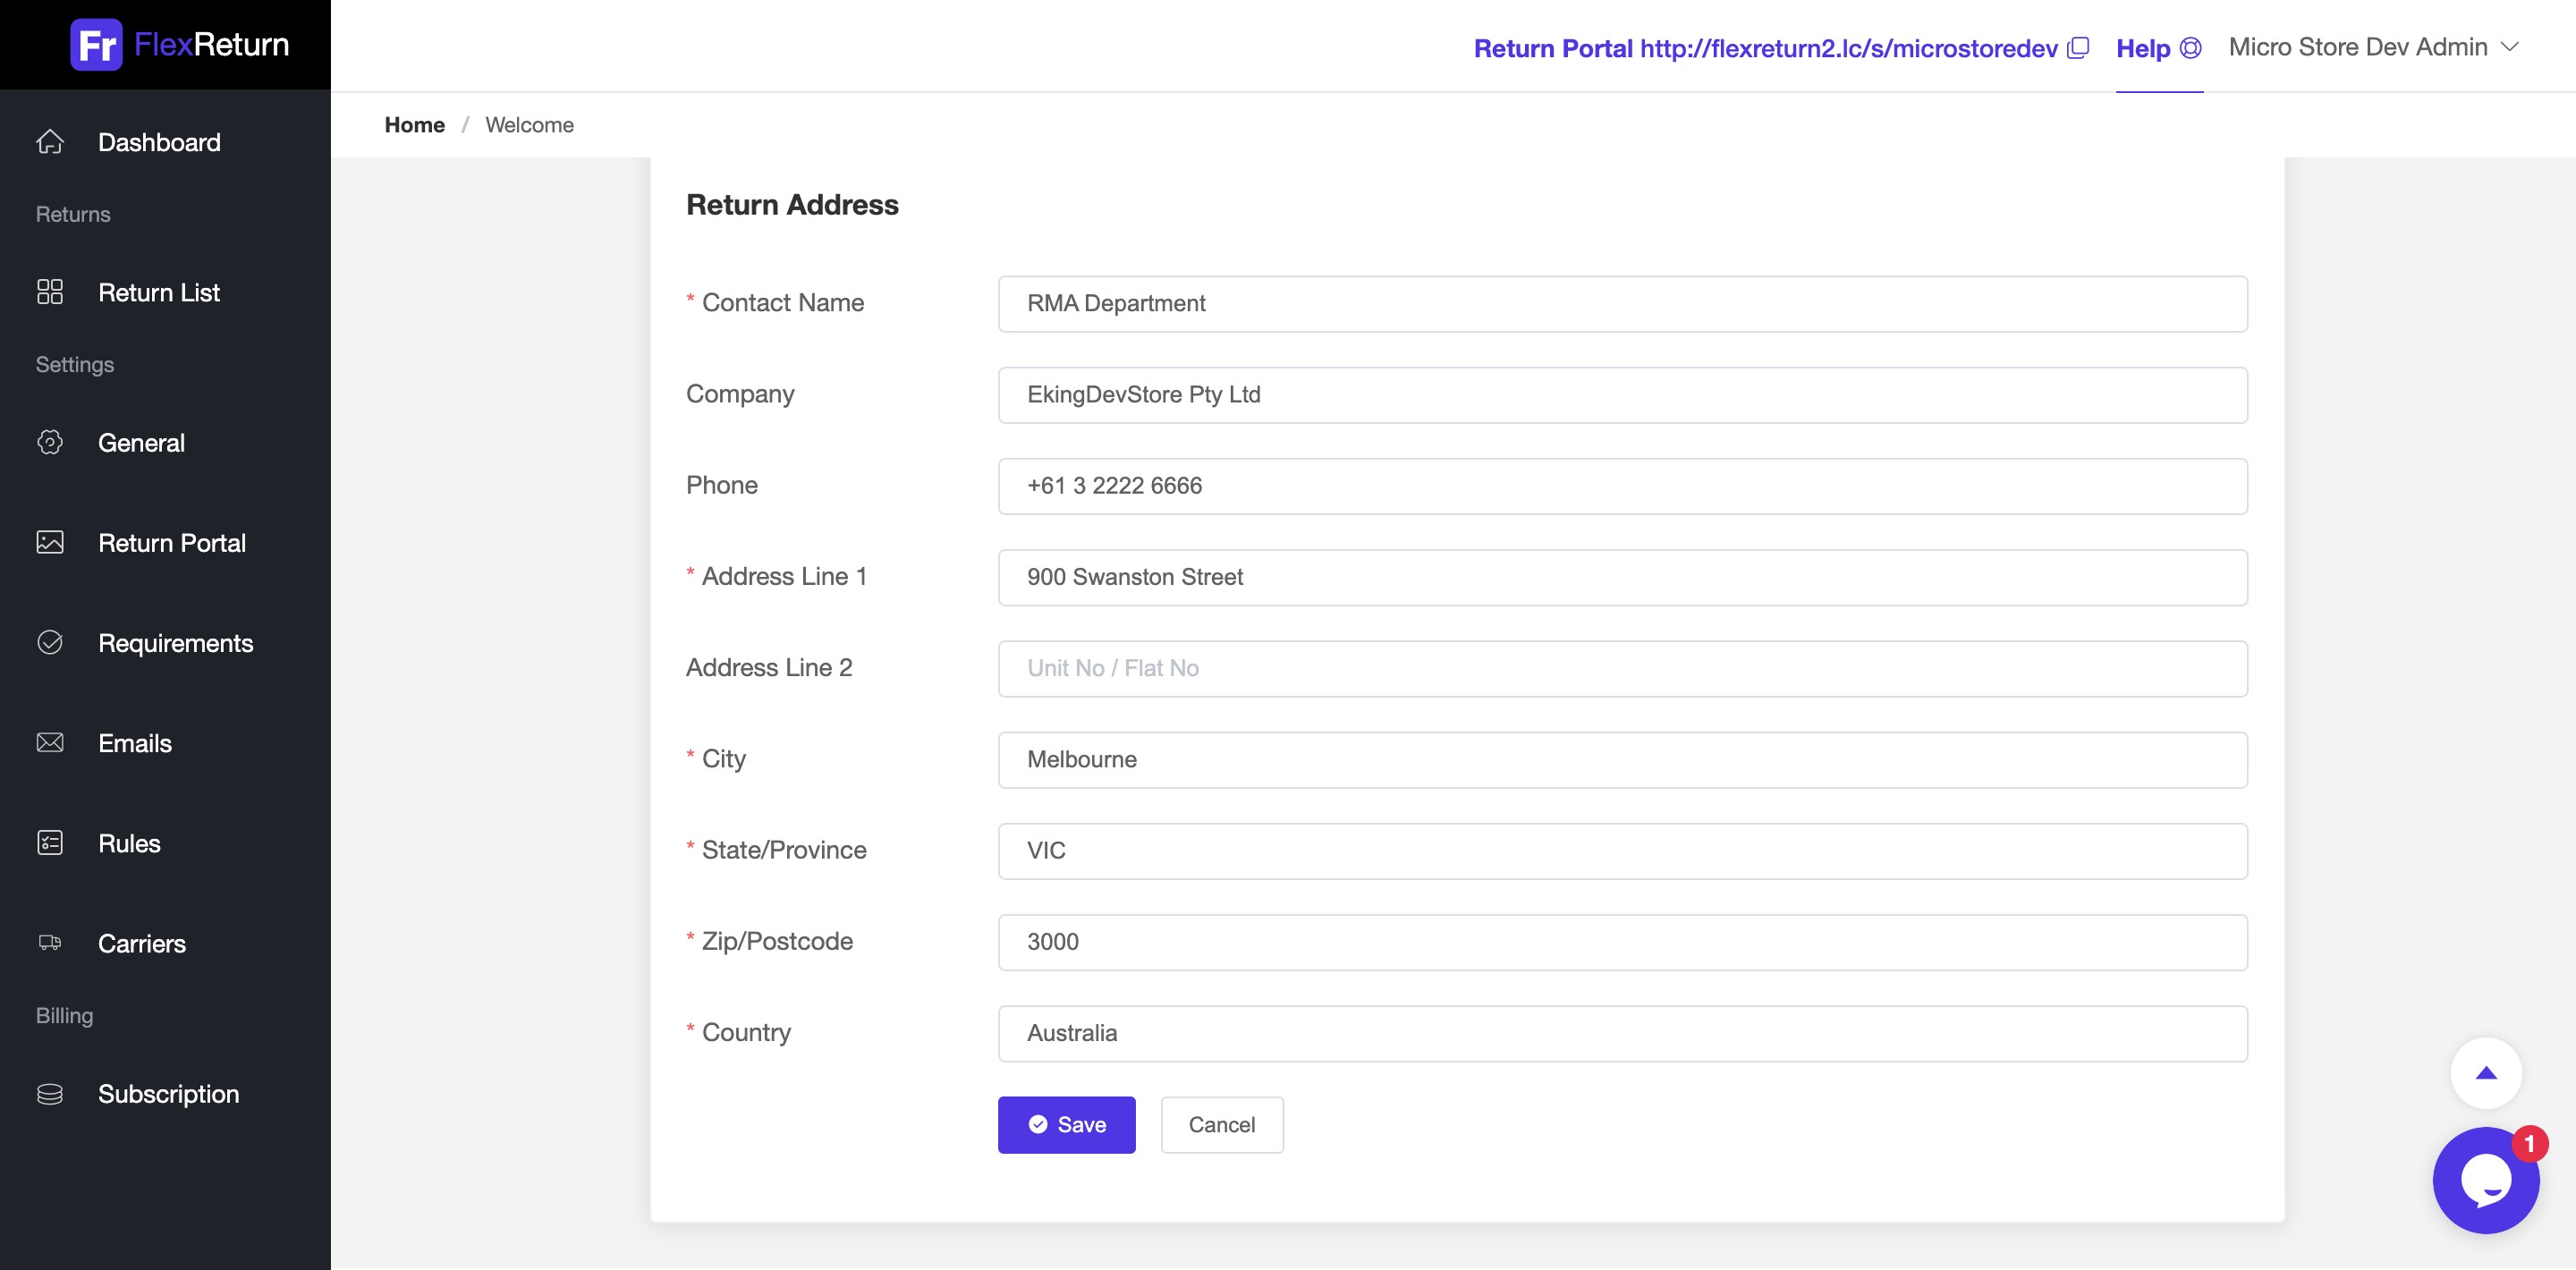
At section Return Address, you can edit the return address, where your customers should return items to. Furthermore, it is used for carrier to generate shipping label automatically.
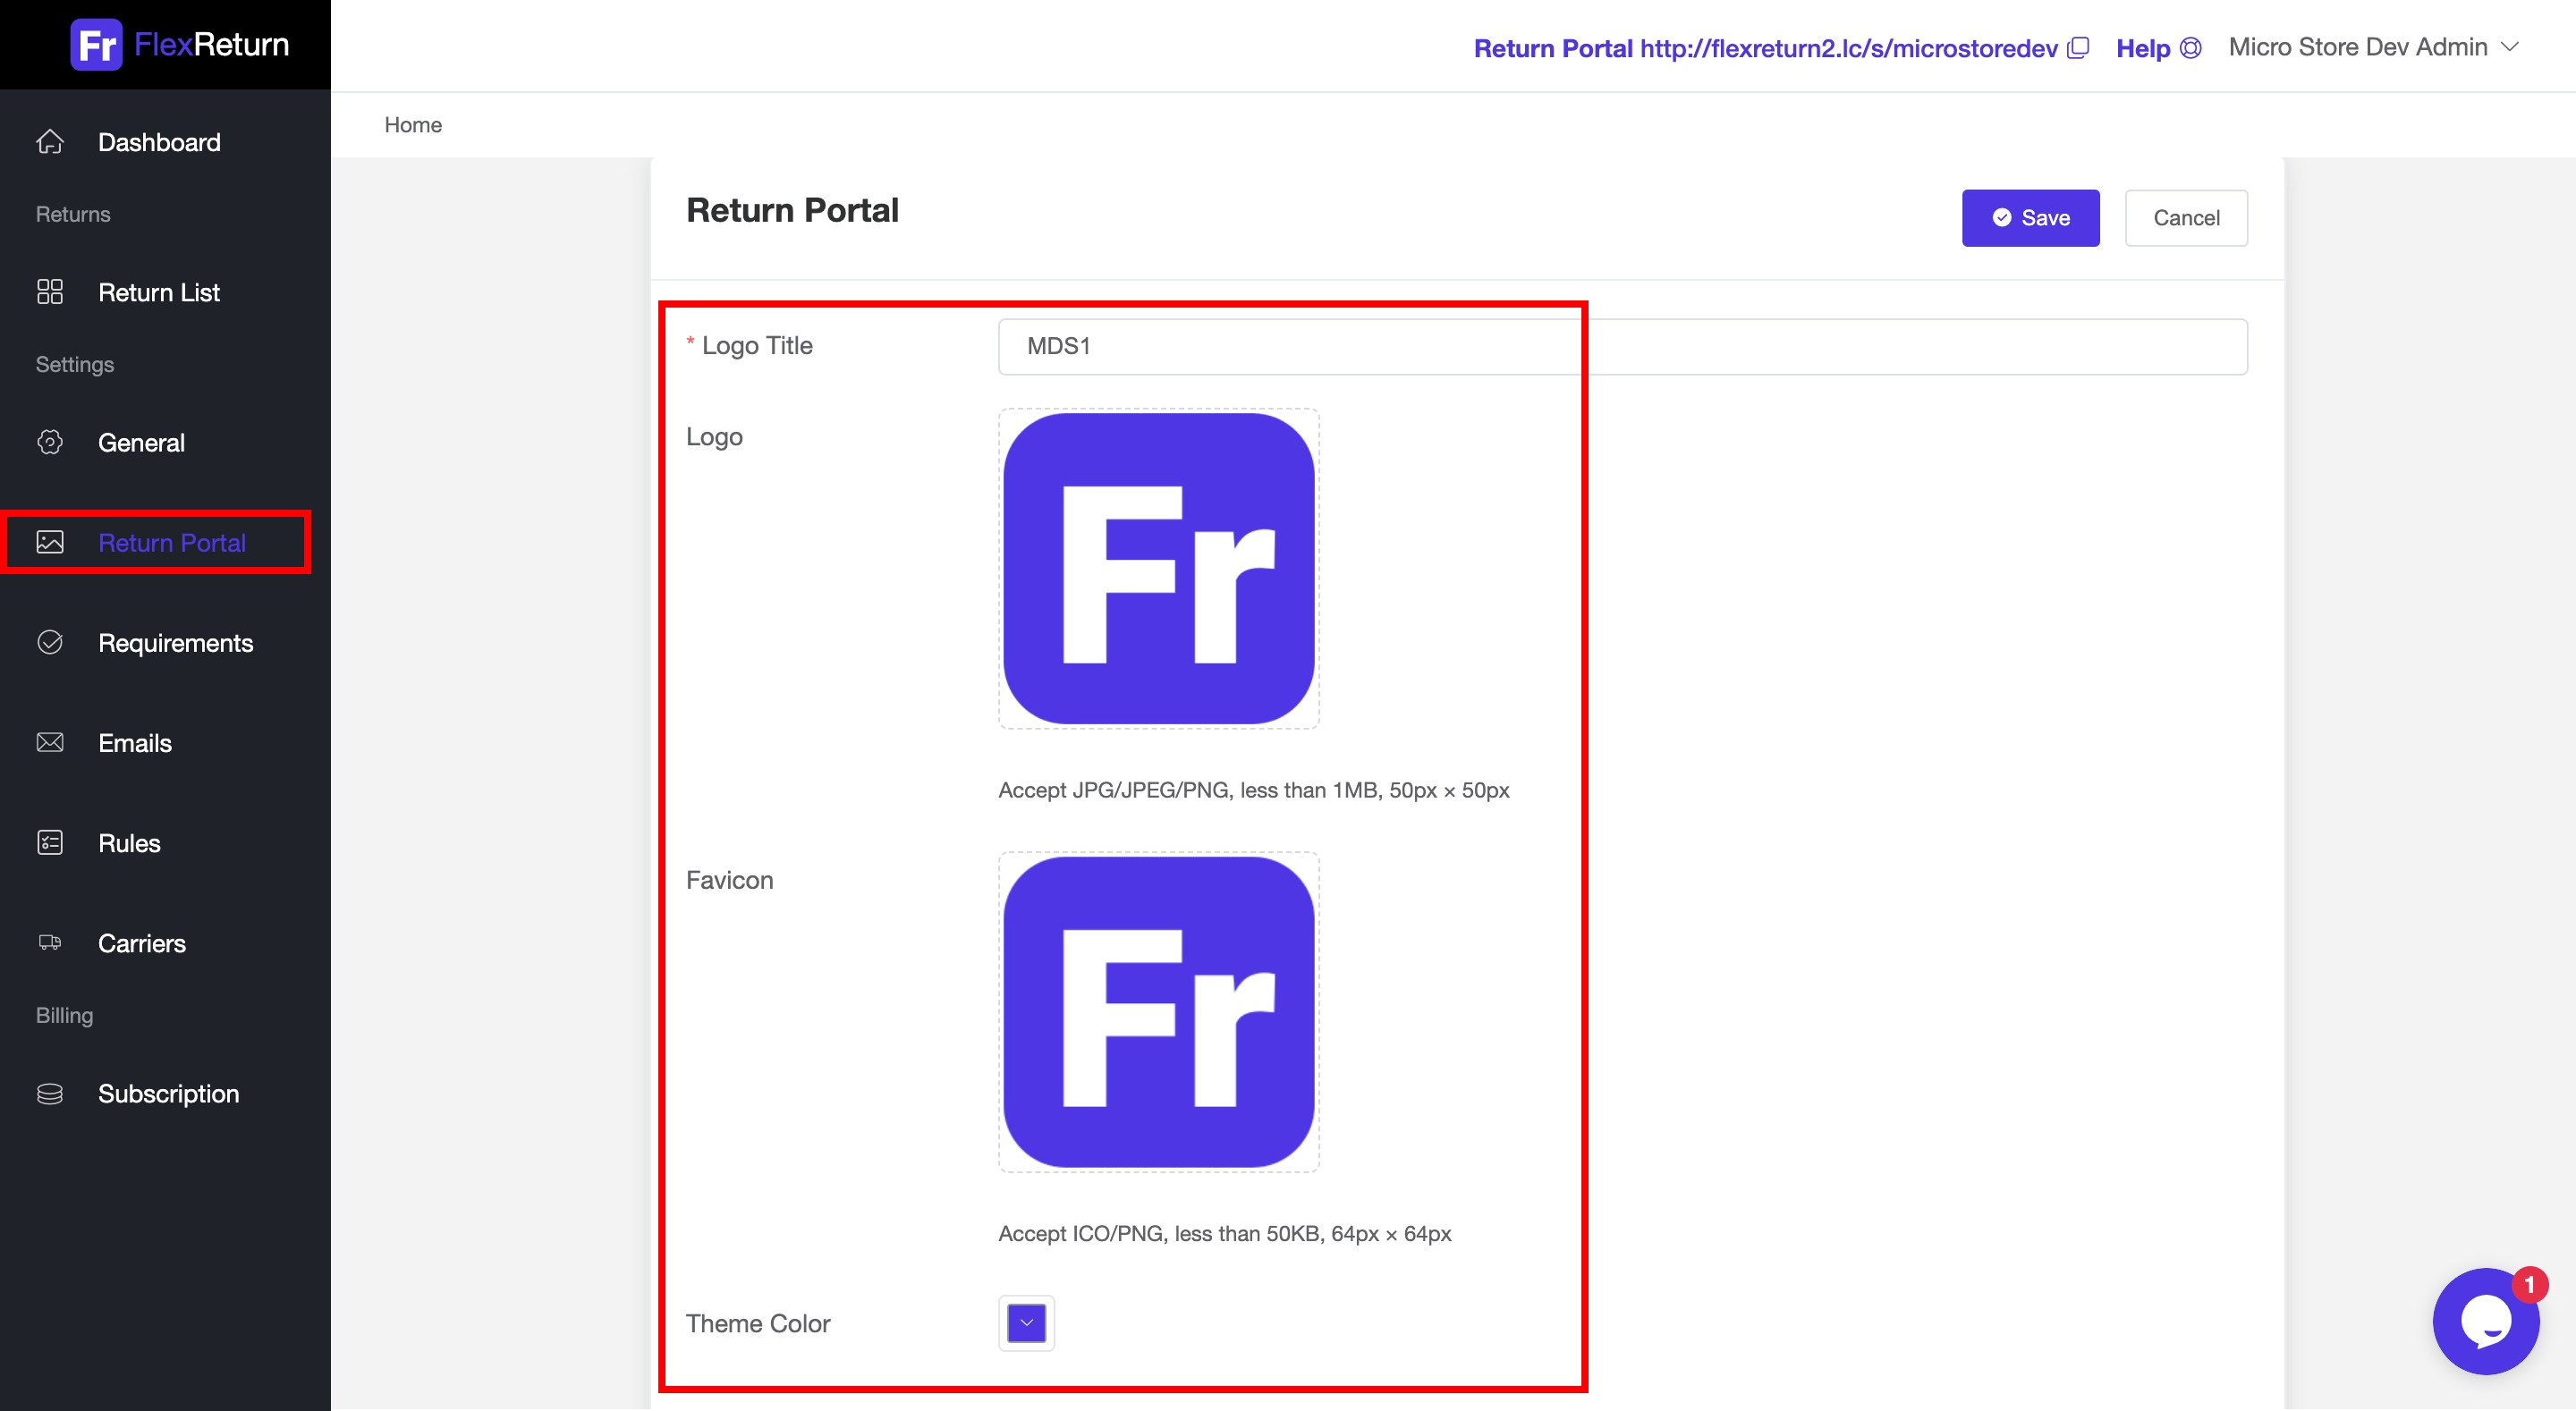
3. Personalize your return portal's looks and feels
Go to Settings > Return Portal, such as logo, theme color, menu, footer links, return policy, social accounts, etc.
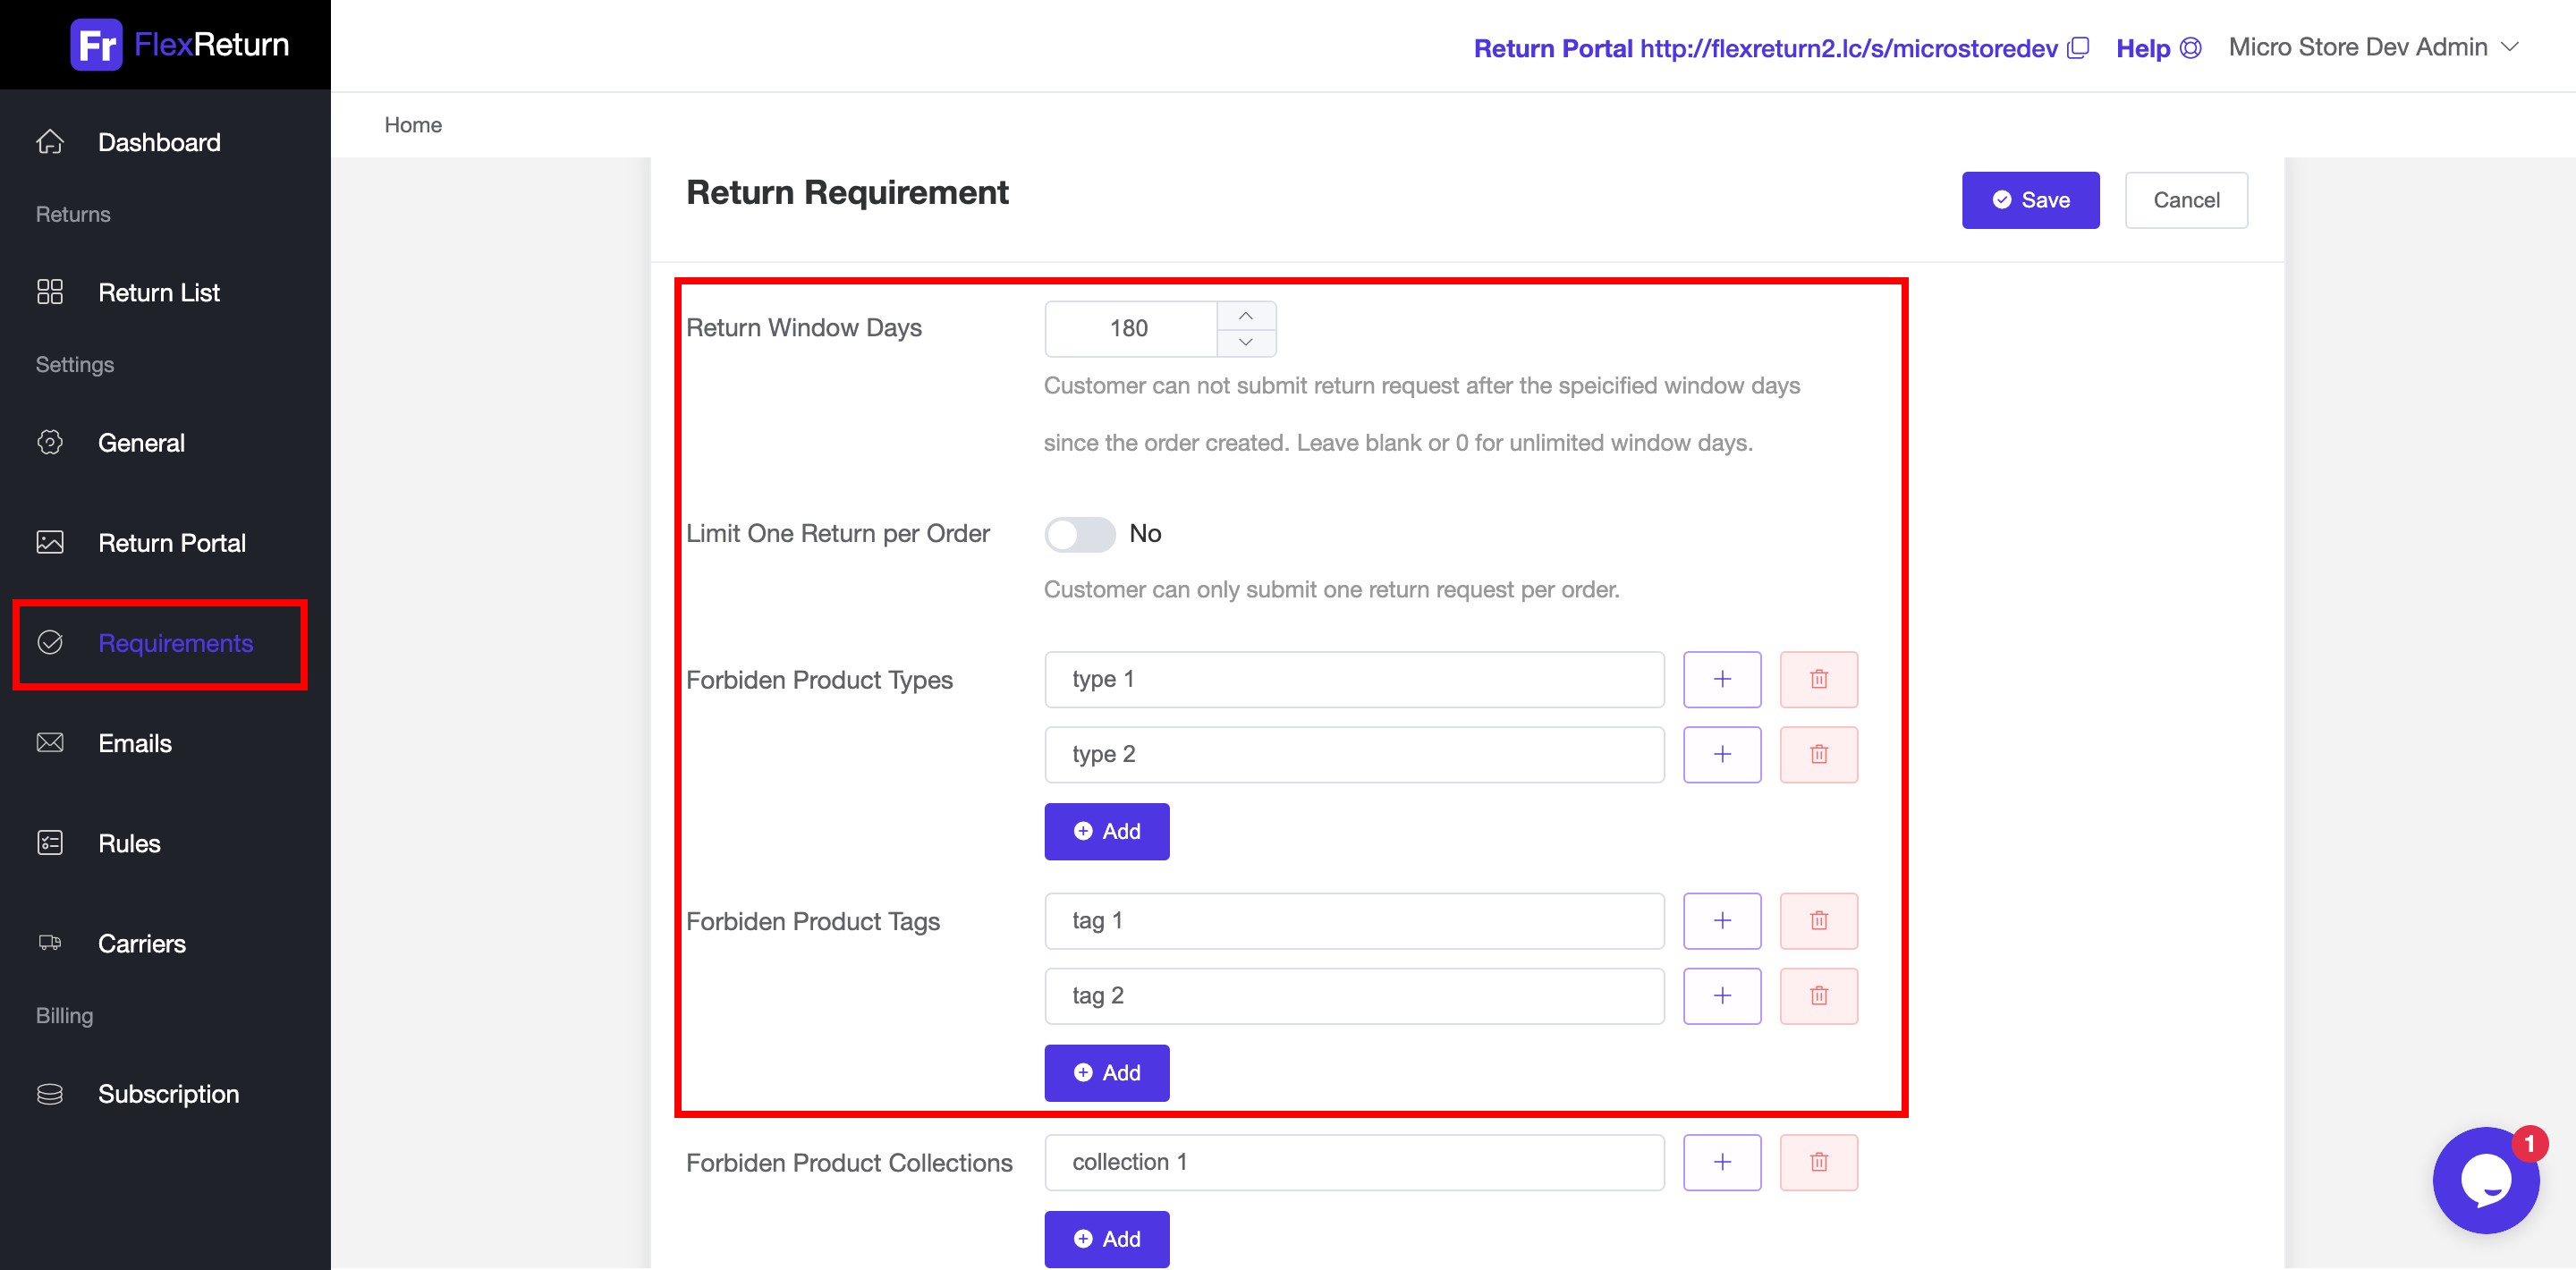
4. Setup return requirements, that can limit what return requests can be submitted.
Go to Settings > Requirements, specify the following requirements:
- Return Window Days
- Limit One Return per Order
- Forbidden Product Types
- Forbidden Product Tags
- Forbidden Product Collection
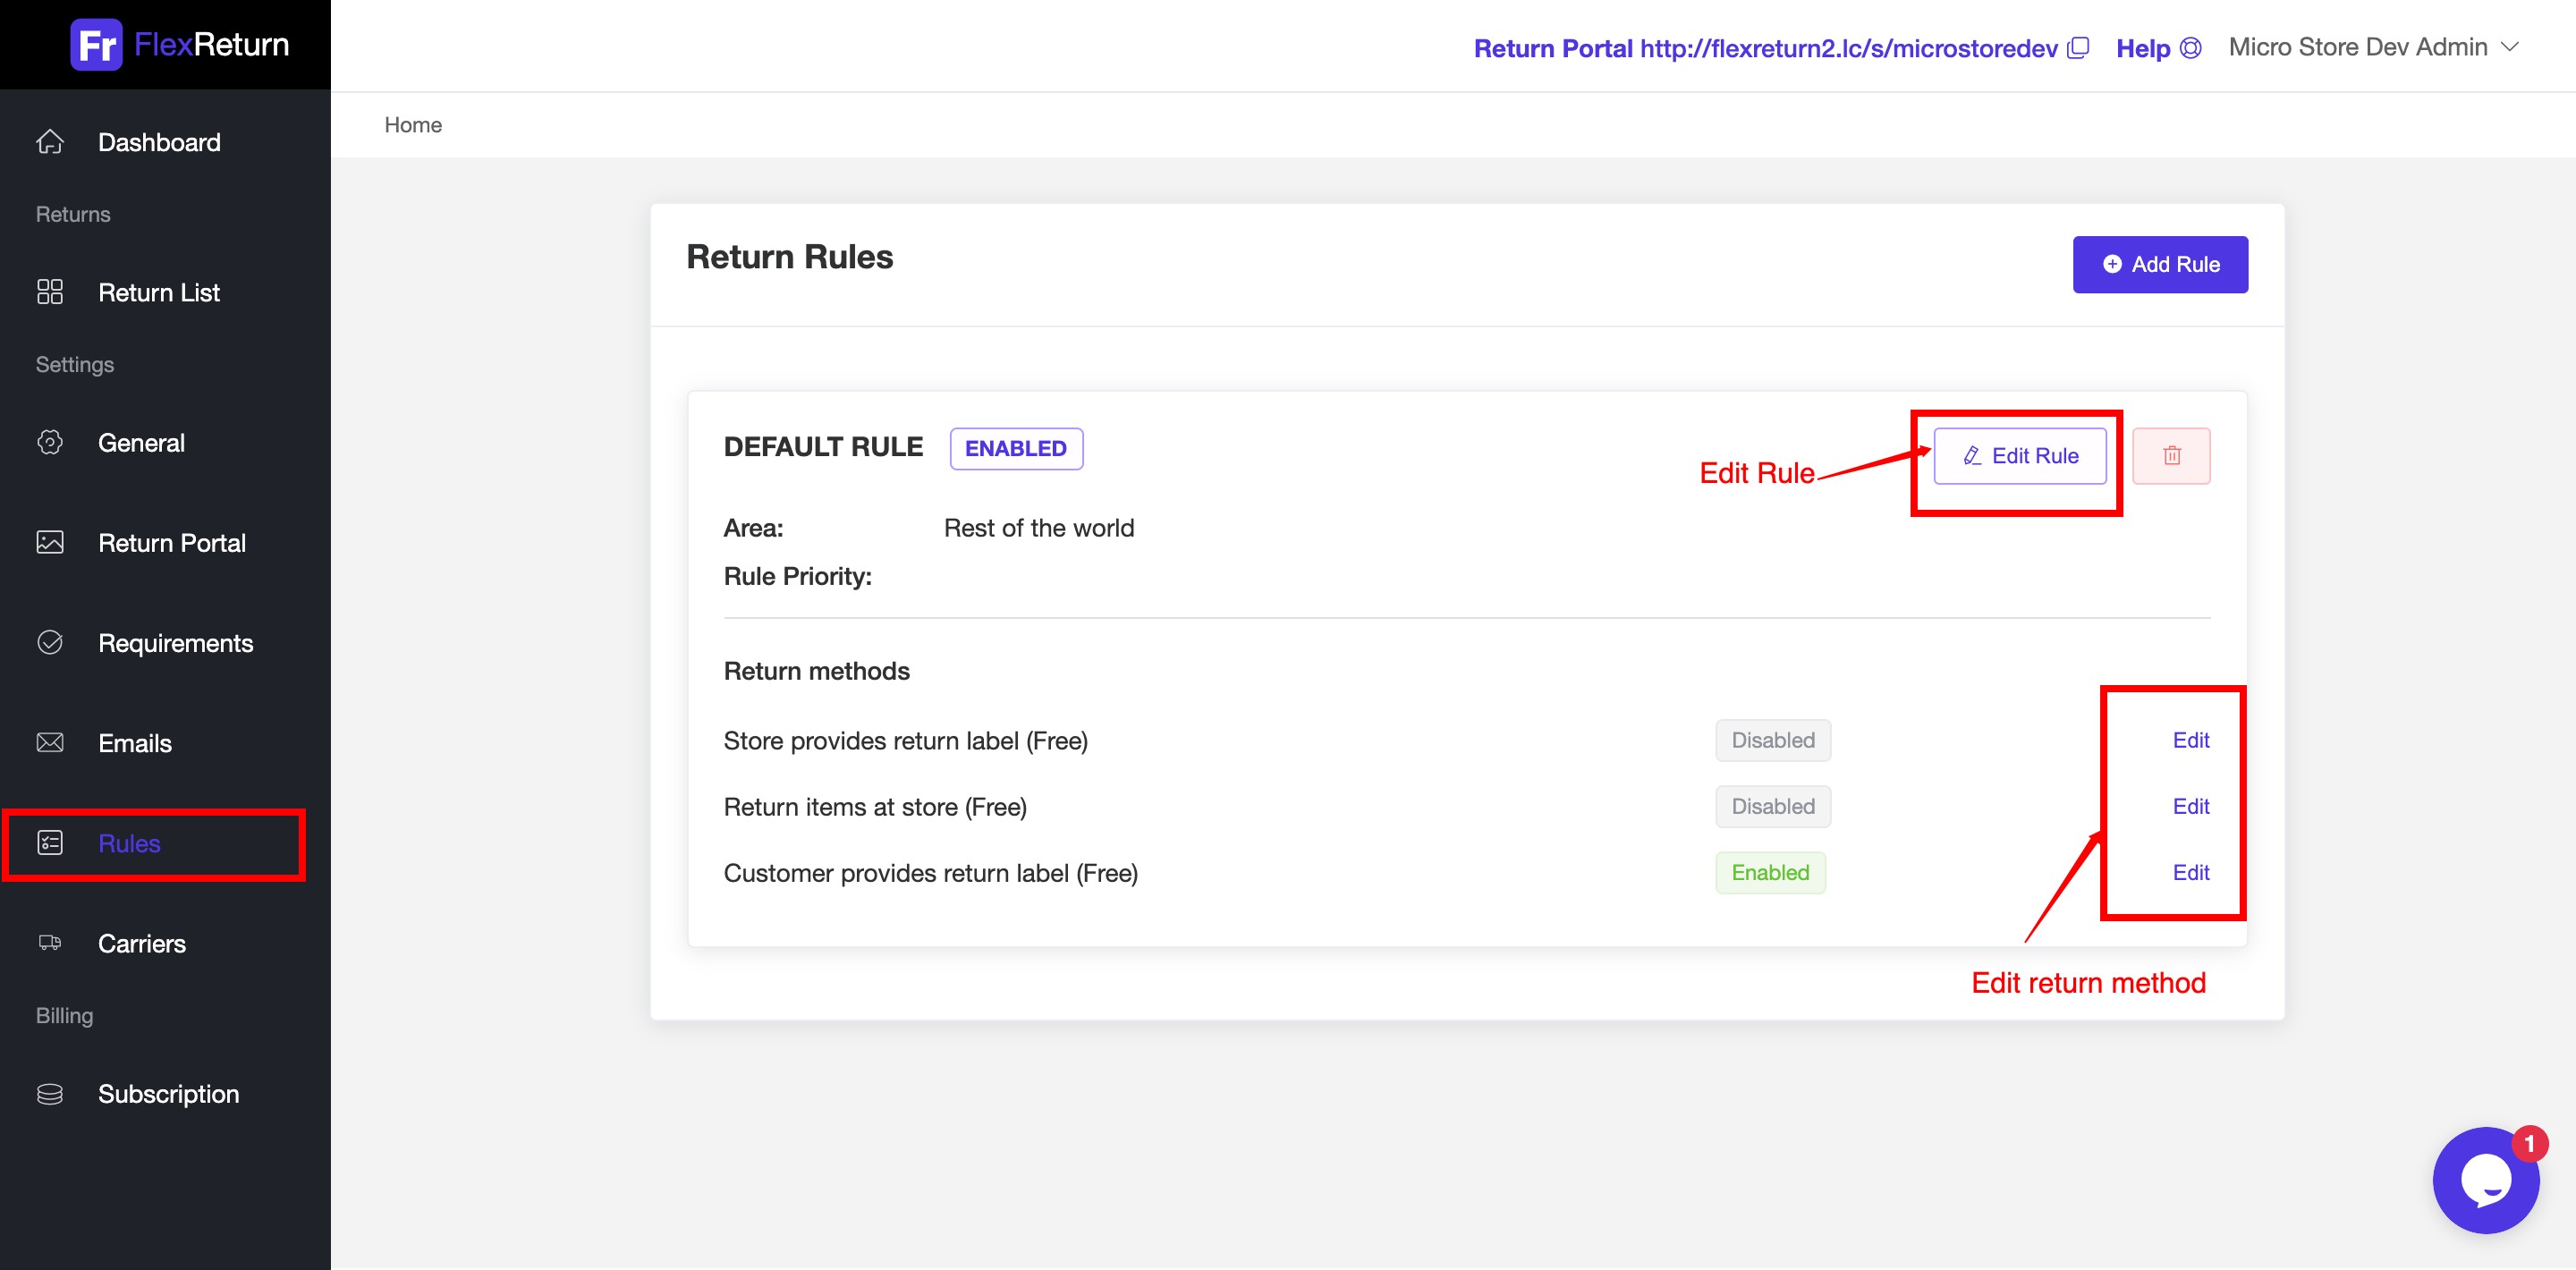
5. Setup return rules and return methods
Go to Settings > Rules, click Edit Rule to edit existing rule, or click Add Rule to create new rule that meets your needs.
There are 3 return methods you can edit:
- Store provides return label
- Customer provides return label
- Return items at store
You can enable/disable each return method, also change its name, description, handle cost, and return instruction.
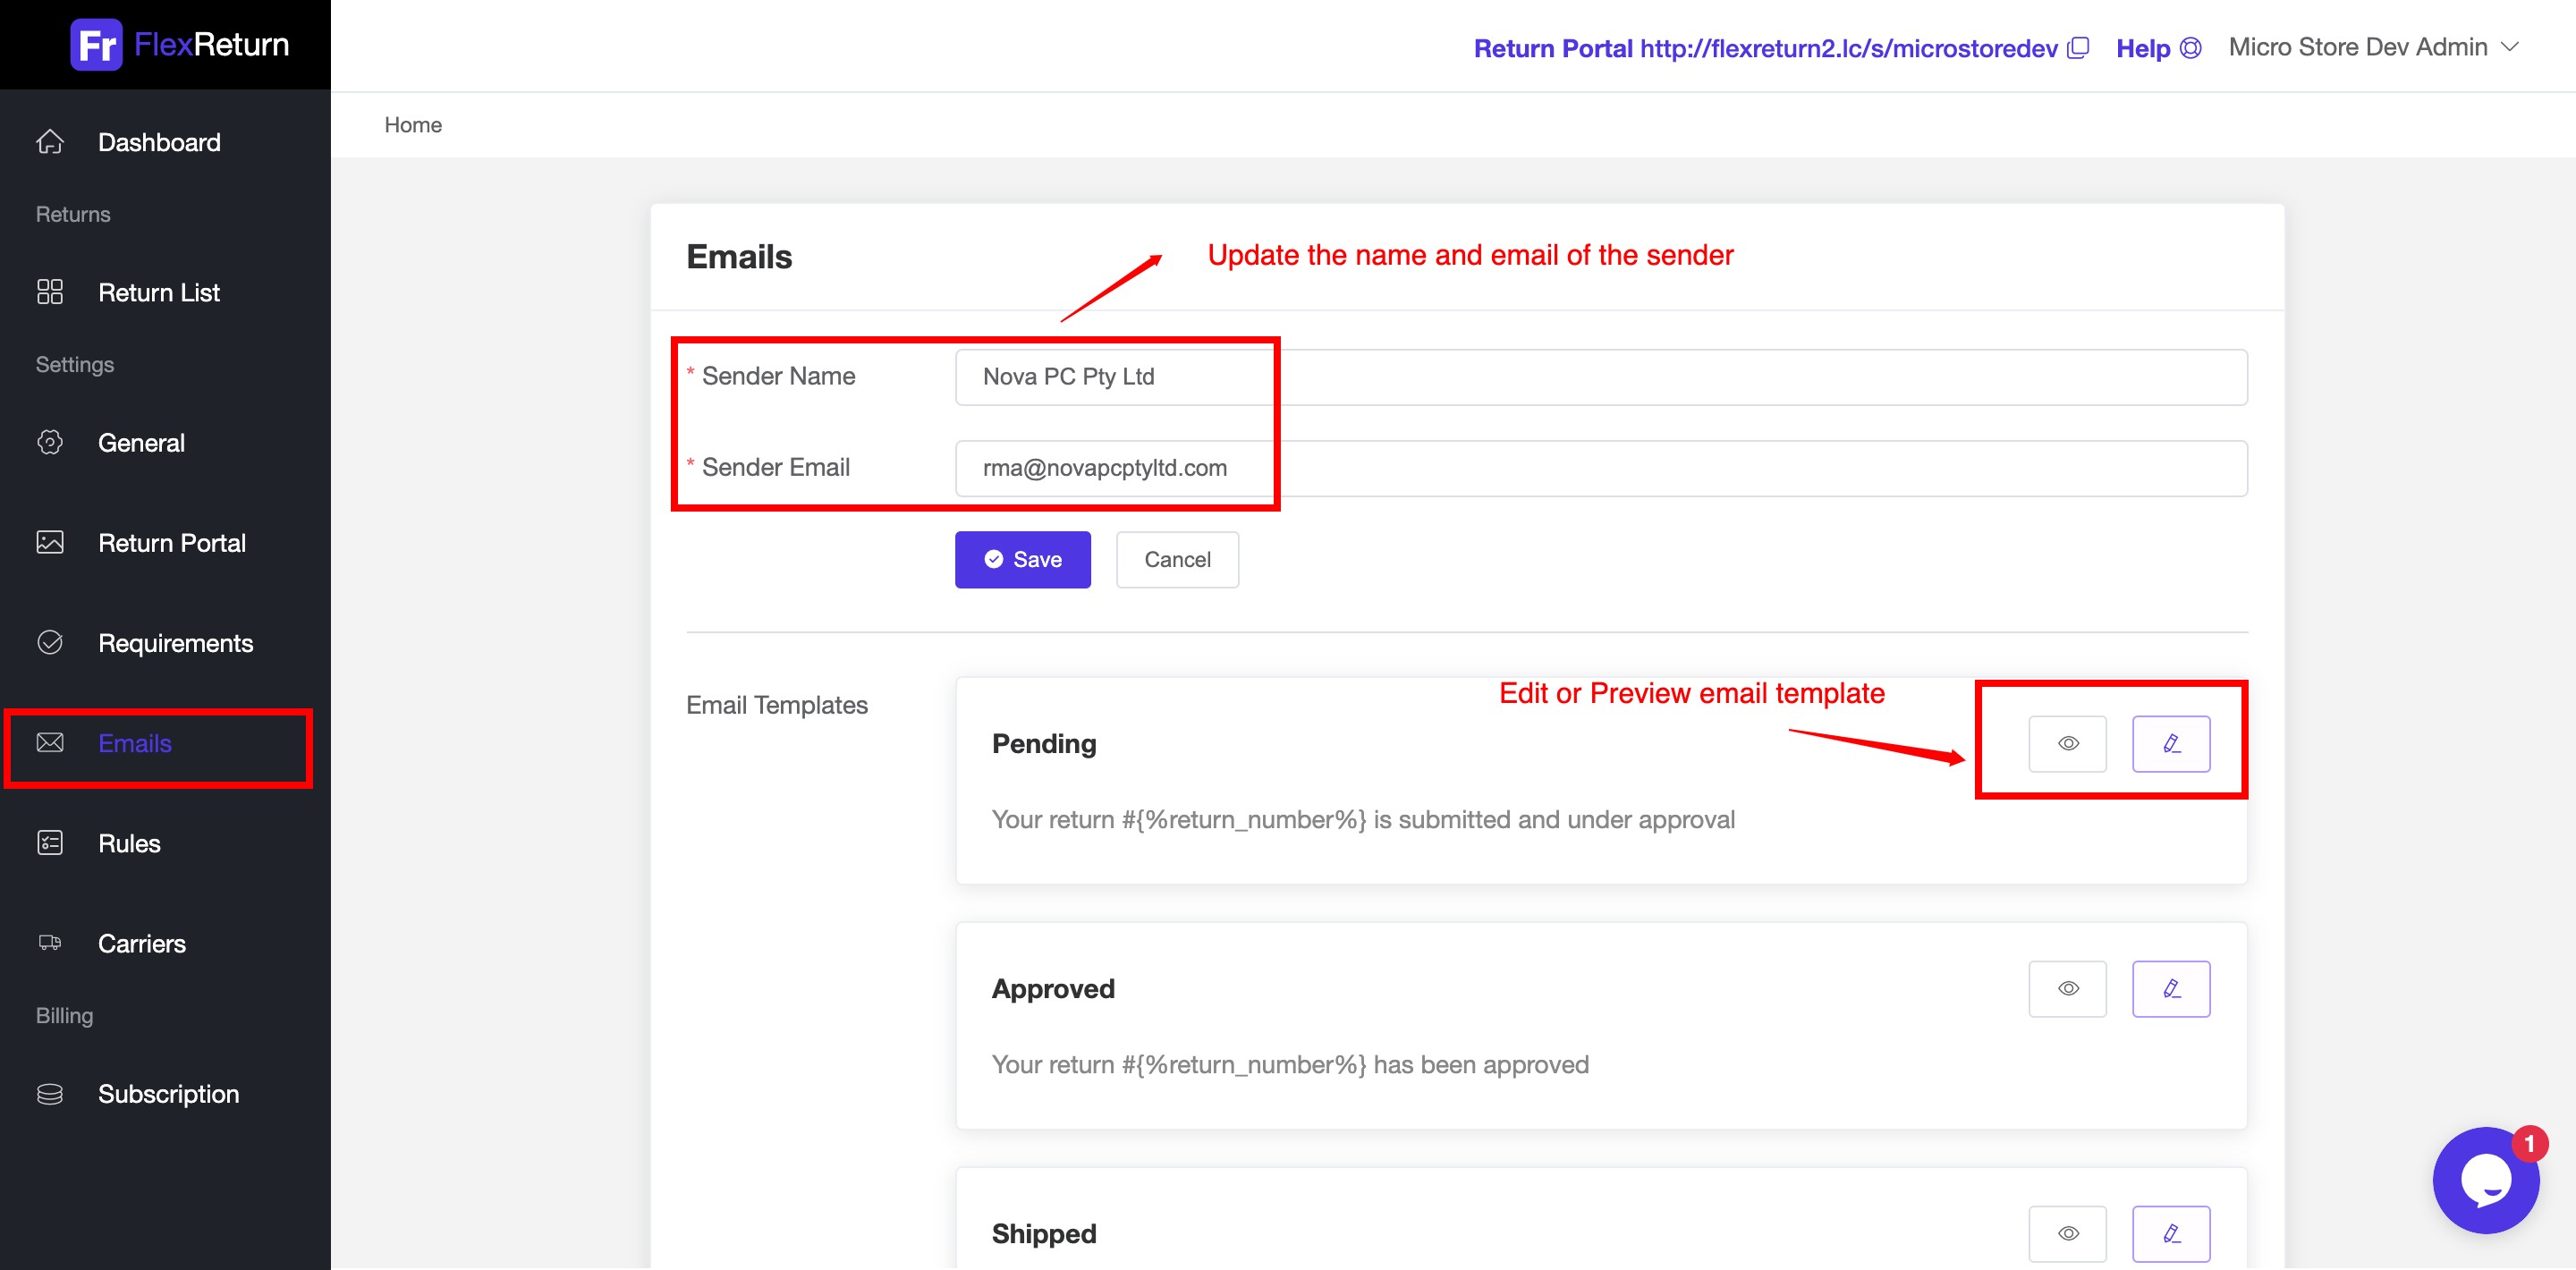
6. Customize email templates of return process
Go to Settings > Emails, click Edit to change email's subject, title, content. Click Preview to preview the changes. You can update Sender Name and Sender Email.
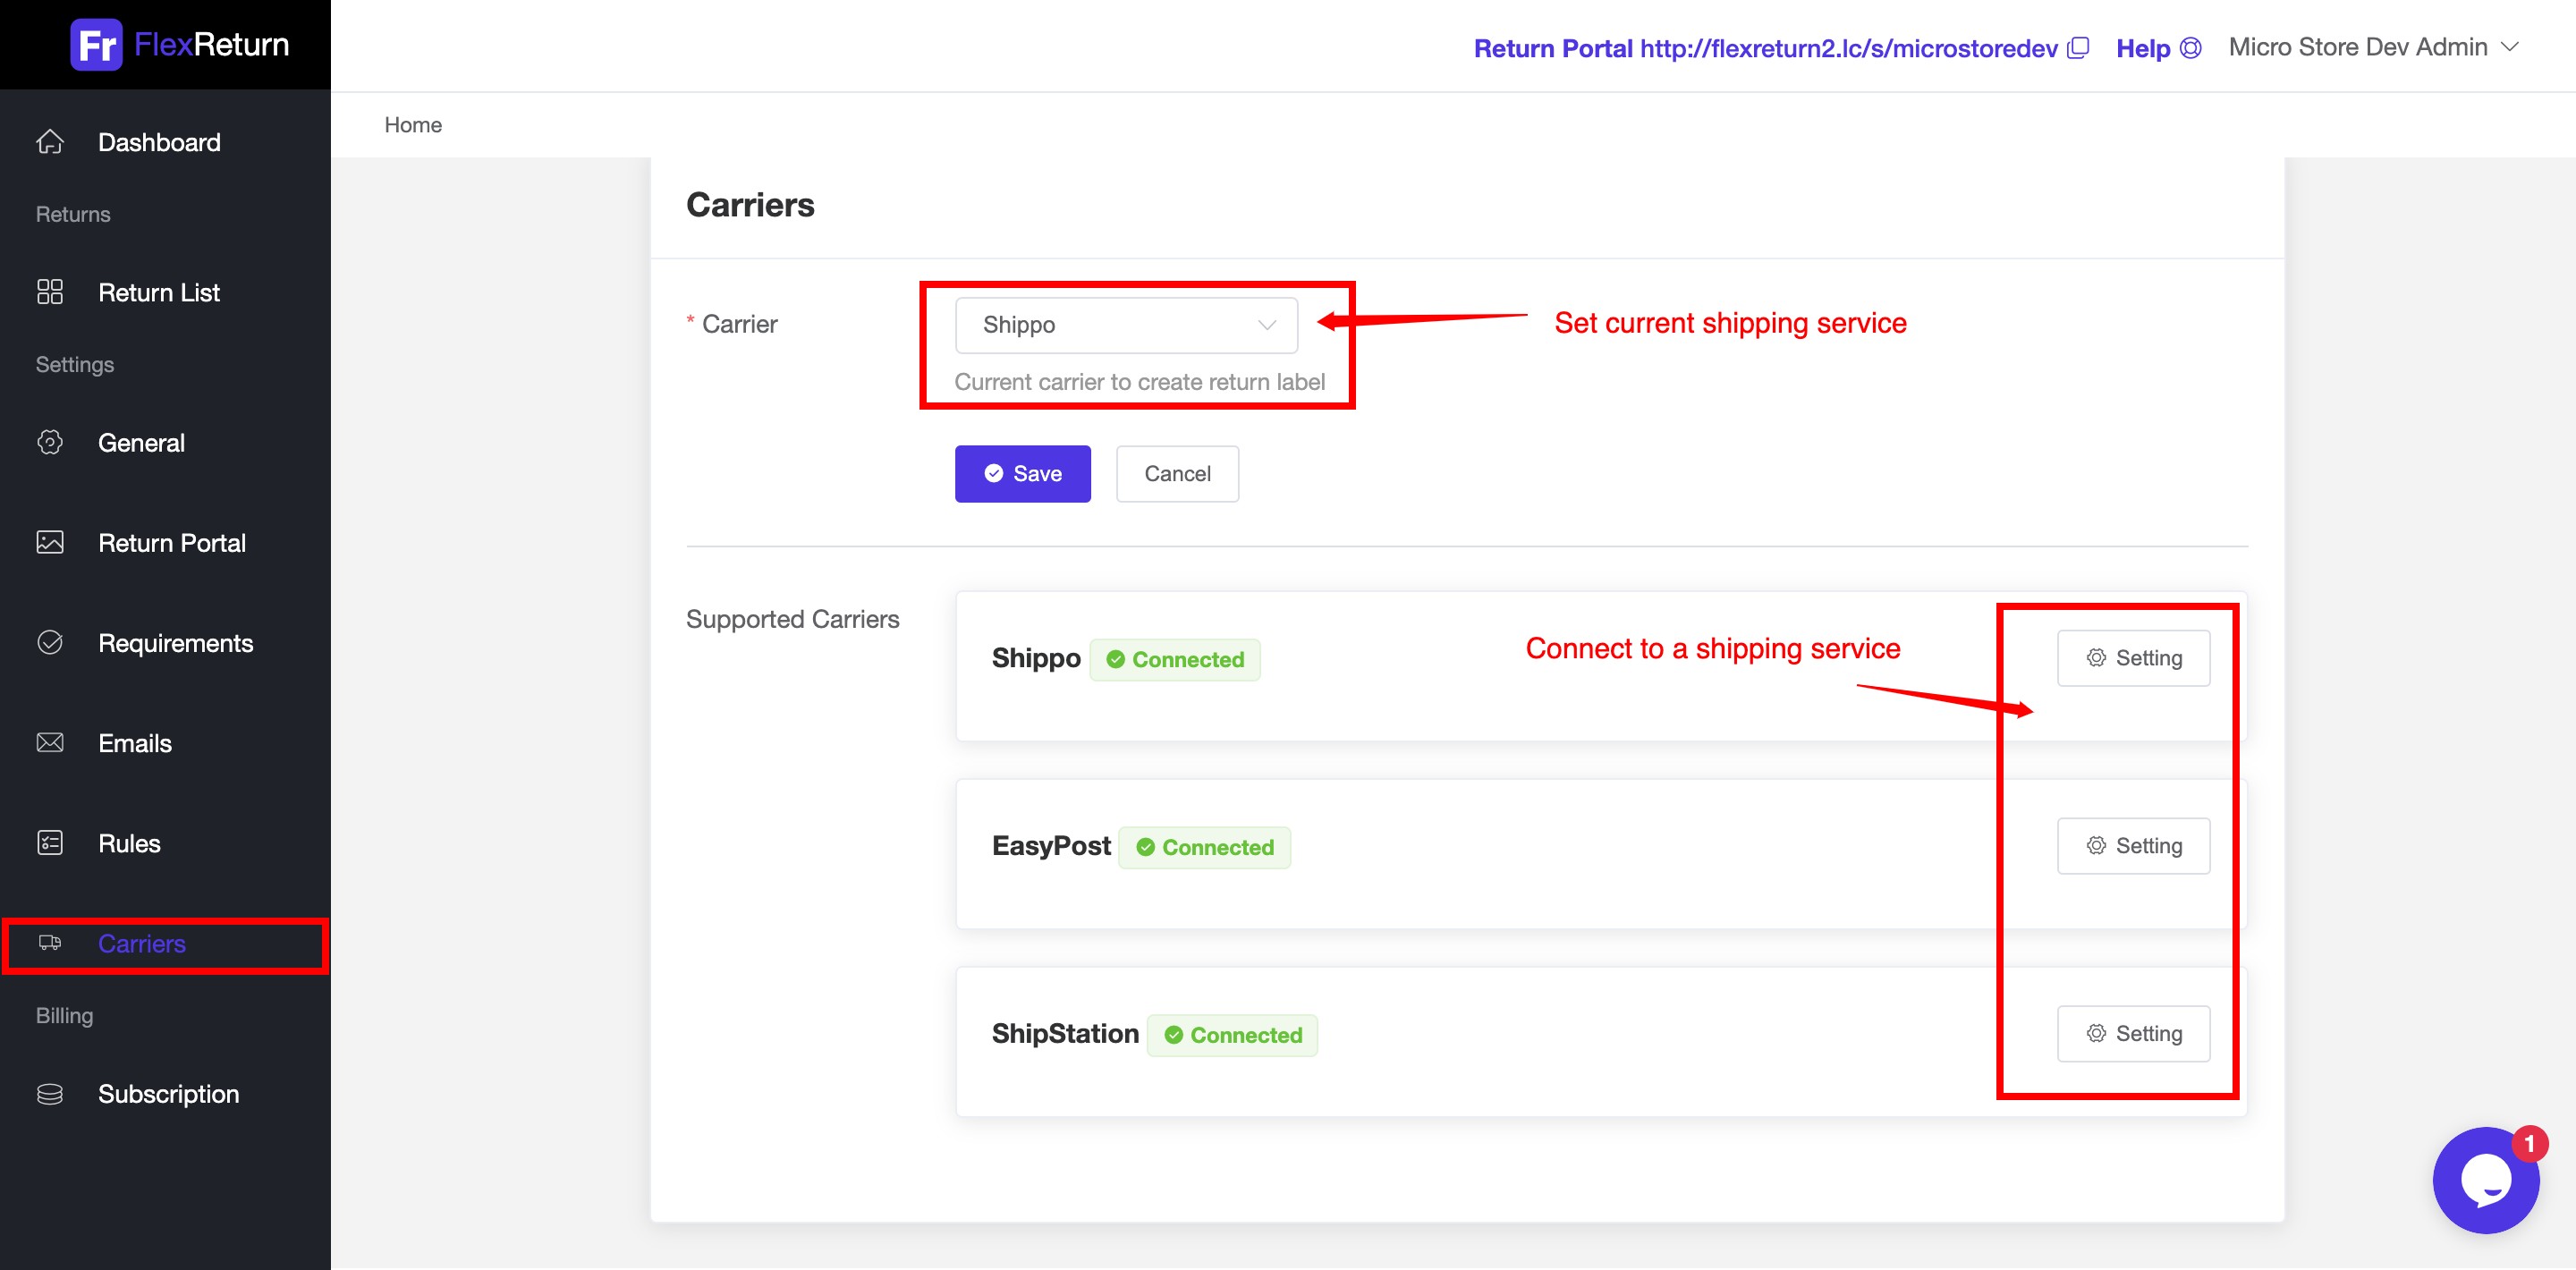
7. Connect to a shipping carrier for automatic generation of shipping label
Go to Settings > Carriers > Supported Carriers, choose a shipping service you want, click Connect, follow the setup wizard to complete the connection. At the dropdown box of Carrier, choose the carrier connected and click Save.
Congratulations!, You have successfully setup your Return Portal. Your customers can start submit order returns now.
Next tutorial is the Return Portal Guide for Customers, about how your customers submit order return step by step.